... Katy Jones gave to us ....
A Christmas Stocking!
Well we couldn't do a Christmas crafting series without one, now could we? Katy very kindly offered this little gem of a tutorial, the perfect stocking for hanging by the fireside if you happen to have one - or at the foot of your bed if, like me, you don't (one day....) I don't think Santa is fussed either way but he is guaranteed to stop for a second to admire your handiwork if you give this little lovely a go.
Katy is the co-founder of
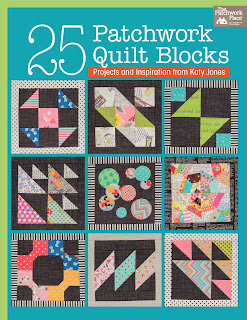
Fat Quarterly magazine, prolific (and often hilarious) blogger and author of 25 Patchwork Quilt Blocks which was published earlier this year and has received rave reviews.
If you love her blog,
Monkey Do (which, if you have read it, you will do!) then you must get this book - plain and simple.
Katy also contributed this cool cotton reels quilt project to the very first edition of the new
Love Patchwork and Quilting magazine. What - not got your subscription yet!? No worries: you can get the first 3 issues for a fiver by following the link
here : ) Katy's book, a subscription to LP&Q mag and a stack or two of fabric would all make excellent fillers for the stocking you are about to make, methinks? Drop a few hints, why don't you?
Right-o over to Katy ...
For my Christmas project I decided to make a large Christmas stocking in the shape of Santa's boot sock. It's a really simple design and doesn't need any templates plus it ends up as a nice big stocking - which means more presents from Santa!
I made chevron shapes from half square triangles, my blocks finish at 5.5" (before sewing them into my stocking) - but you could easily use simple patchwork and cut your fabric into 5.5" squares instead of making all those half square triangles. My plan is to make a second version using the same fabrics (
Kate Spain in from the cold) but squares instead.
You will need;
a dinner or side plate (for making the curved edges of your stocking)
short length of ribbon (for the hanging loop)
Firstly either cut 14 5.5" squares from your fabrics for a plain patchwork version, or make 14 chevron blocks from half square triangles that will finish at 5.5" (3" half square triangle units - 4 units per chevron block). You can find a really good and thorough tutorial for half square triangles at
about quilting.
Lay them out in rows like the picture below....
Sew the rows together and press all of your seams nice and flat. Press the red FQ and layer up underneath the patchwork stocking shape. Cut the half metre of green lining fabric and place that underneath too - so that all of your fabrics are neatly stacked together.
Now take the plate and use the curved edge to round off the heel and the toe section of the stocking. You don't want to make this too severe - just a nice curve. I used a frixion pen that will disappear with a hot iron, but you could use chalk or a pencil. Anything that will disappear.
Carefully cut through all 4 layers of fabric so that your stocking looks like the picture below....
Now pin the back of the stocking to the patchwork front - laying them right sides together, and sew around using a good 1/4"seam allowance making sure you leave the top open (just like a sock!)
Do the same with the lining fabric - but this time leave a hand width gap in the bottom or about half way down one side for turning later.
Using scissors, clip notches into the curved bits. Be careful not to go through the stitches!
Turn your outside stocking right way out and press. You can now add a hanging loop, a short length of ribbon pinned to the top of the stocking. When you pin it, make sure it's pointing downwards - like in the picture!
A close up....
Now carefully place the outside of the stocking into the lining so that right sides are facing. ensure your pinned loop is still pointing down and nice and flat. Poke the toe of the stocking into the toe of the lining (remember your lining is still wrong way out - the stitching is on the outside. The patchwork part of the stocking is right way out but inside the lining!) Pin around the top of the layers, and sew together using a good 1/4" seam allowance.
This is the fun bit - pull the patchwork stocking out through the opening in the bottom or side of the lining, and once it's all out, poke the lining into the stocking and slip stitch or machine stitch the opening closed.
Remove the pin from the hanging loop and if you like, top stitch around the top of the stocking. Give it all a good press
Now you can hang your stocking up and wait for Santa to come and fill it!
Thanks Katy - a really beautiful stocking. Be sure to check out Katy's blog for more quilting delights and to pop back here for the next installation of our Christmas project countdown!
