
Lisa at Sew Blue Poppy gave to me .....
a fabric Christmas card tutorial

Lisa creates beautiful handmade fabric gifts using free hand machine embroidery.
From personalised bunting and egg cosies ....

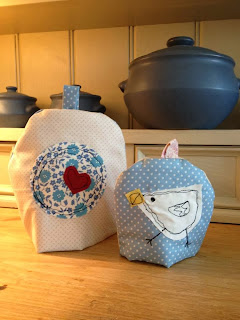
... to make-up bags and cushions.


Lisa's sense of fun and colour shine through in all of her designs. If you would like to find out more or commission a piece from this very talented lady, come see some of her work at Fabric HQ, The Barn Courtyard, Wendover or contact her via her facebook page


In this tutorial she shows you how to use this technique to make your very own Christmas cards that are guaranteed to take pride of place on the recipient's mantelpiece this holiday season.
1. Firstly, you will need some
cardstock. You can either buy large sheets of card and cut to size or you can
buy ready cut packs of cards with envelopes.
I am using 5x5 inch cream ready cut card.

2. Now you will need to choose
some backing fabric. This is the fabric onto which you will sew your appliqué
design and then sew to your card.
I have chosen some lovely natural linen.
You will need to cut a square of this fabric slightly smaller than the
size of your card. In my case, I have cut out a 4x4 inch square.

3. Next, it’s all about your
appliqué design. Choose some lovely Christmassy fabric and cut out your shape.
I drew my design freehand on some tracing paper first and once I was happy with
the shape, transferred this to the fabric and carefully cut it out.

4. Next comes some wonderful free
hand machine embroidery. In order to set
your machine up for free hand machine embroidery, you must remember these
important rules;
·
Drop the
feed dog on your machine. You want your fabric to be able to move freely under
the needle so make sure that this is dropped below the metal plate on your
sewing machine.
·
Take off
your sewing foot. If you have an embroidery foot with your sewing machine, then
attach this now. Otherwise you can use the machine without a foot but please
please don’t sew your fingers! Take great care to keep your fingers away from
the needle.
·
Lastly,
change your stitch length to zero and you are ready to go.
Position your appliqué
fabric on top of your square and pin it in place. As the square of fabric is
too small to use an embroidery hoop I find that pinning a piece of paper
underneath the fabric square helps to stabilise the fabric while you sew.

Sew all the way around
the edge of your appliqué fabric. Don’t
worry if you have some wobbly lines, this is the joy of machine embroidery and it
will make each card you make unique.

5. Before you do anything further, remember to
set your machine back up for normal sewing. Feed dog back in the up position,
stitch length returned to normal and sewing foot back onto your machine.
6. Next add any embellishments. I have chosen a
piece of lace, a vintage button and some raffia but the options are endless.
Hand or machine sew these in place before moving onto the next step.

7. Now it is time to sew your fabric square onto
your card. I used a straight stitch but a zigzag stitch would work well too. Sew
around the outside of your fabric square onto the front of your card and trim
any loose ends.

8. Ta da! Your lovely handmade fabric Christmas
card is complete. Now all you need to do is decide who the lucky recipient is
going to be and spread a little Christmas joy.
Thank you so much Lisa for this beautiful tutorial. Come back next Wednesday for the next of our great festive gift ideas!
No comments:
Post a Comment